How to Set Printable Area in Excel
If you’re looking for a simple and efficient way to optimize your Excel printing process, one effective method is to set the printable area of your worksheet. This allows you to specify the exact range of cells that you want to print, eliminating any unwanted or unnecessary content. In this post, we’ll walk you through the steps to set the printable area in Excel, whether you’re using the desktop version or the online Excel experience. With these techniques at your disposal, you can easily create custom printouts for your data, saving you time and improving the clarity of your printed reports.
Method 1: Setting Printable Area in Excel Desktop Application
The Excel desktop application provides an array of features, including setting the printable area. Here are the steps to follow:
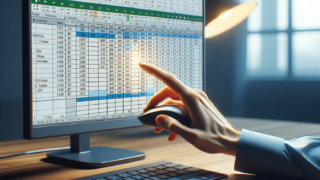
Step 1: Select the area you want to print
Highlight the area you want to set as the printable area. Make sure you include all the relevant cells and columns that you want in the printout.
Step 2: Click on the ‘Page Layout’ tab
On the top ribbon in Excel, you’ll see the ‘Page Layout’ button. Click on it to open up a set of print options.
Step 3: Click on ‘Print Area’
Within the Page Layout tab, click on the ‘Print Area’ button, located in the ‘Page Setup’ group.
Step 4: Select ‘Set Print Area’
Click on the ‘Set Print Area’ button in the drop-down menu.
Method 2: Setting Printable Area in Excel Online
You can also easily set the printable area in Excel Online. Here are the steps to follow:
Step 1: Select the area you want to print
Highlight the area you want to set as the printable area. As with the Excel desktop application, make sure you include all the relevant cells and columns that you want in the printout.
Step 2: Click on ‘File’ tab
On the top left-hand corner of the Excel file, click on the ‘File’ button. This will display the file options menu.
Step 3: Select ‘Print’
From the options menu, select the ‘Print’ button. This will take you to the print preview window.
Step 4: Set the printable area
Within the print preview window, click on the ‘Settings’ button. This will open a set of print options that you can adjust, including the printable area. Under ‘Print Settings,’ select ‘Print Selected Cells’ or ‘Print Selected Worksheets’ as needed.
Whether you’re using Excel Online or the desktop application, setting the printable area in Excel is an easy way to optimize your data presentation and printing. By following these steps, you’ll be able to get customized printouts that fit your needs.
Additional Tips for Setting Printable Area in Excel
Here are some additional tips to keep in mind when setting the printable area in Excel:
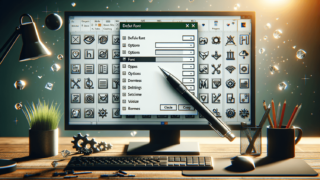
Tip 1: Use the ‘Page Setup’ dialog box to fine-tune your settings
If you need to adjust your print settings further, you can use the ‘Page Setup’ dialog box to fine-tune your printing options. This dialog box can be accessed by clicking on the ‘Page Setup’ button in the ‘Page Layout’ tab in Excel, and you can use it to make changes to margins, orientation, scaling, and other print settings.
Tip 2: Practice selective printing
One of the advantages of setting the printable area is the ability to practice selective printing, which can save paper and printer ink. Instead of printing an entire worksheet, consider printing only specific sections that are relevant to your needs. This can be especially helpful when printing lengthy financial statements or data tables with rows and columns that are not relevant.
Tip 3: Preview your printout before you print
It’s always a good idea to preview your printout before you actually hit the print button. This allows you to check for errors, make any necessary adjustments, and get a sense of how your printout will look on paper.
Tip 4: Save your print settings as a template
If you find yourself frequently printing the same data range with the same formatting options, you can save your print settings as a template. In the Page Setup dialog box, select ‘Print Area’ and then choose ‘Set Print Area.’ Choose any other print settings such as scaling, headers, and orientation. Click ‘OK’ when you are done. Then, go to ‘File’ > ‘Save As’ > ‘Computer’ > ‘Save as type’ and select ‘Excel Template (*.xltx)’ from the drop-down menu. Give the template a name and save it. The next time you need to print the same data range with those settings, select the ‘Personal’ templates under ‘New’ and choose your custom template to apply the settings.
By following these tips and tricks, you can make the most out of Excel’s printable area feature, and get customized printouts that meet your specific needs.
FAQs about Setting Printable Area in Excel
Here are some frequently asked questions about setting printable area in Excel:
Q: Can I set the printable area for multiple worksheets at once in Excel?
A: Yes, you can set the printable area for multiple worksheets at once in Excel. To do so, select all the sheets you wish to print. Then select the print area and set it for one sheet which will apply the settings to all the selected sheets.
Q: Can I restore the printable area to its default setting?
A: Yes, you can restore the printable area to its default setting. To do so, select the entire worksheet by clicking on the top left corner where the row and column labels intersect. Then, go to the ‘Page Layout’ tab and click on the ‘Print Area’ button. Select ‘Clear Print Area’ and the printable area will be restored to the entire worksheet.
Q: Can I set the printable area for a non-contiguous range of cells?
A: Yes, you can set the printable area for a non-contiguous range of cells. To do so, select the first range you want to print. Hold down the ‘Ctrl’ key on your keyboard and select the other ranges you want to include in the printout. Then, follow the steps outlined earlier to set the printable area.
Q: How do I know what my printout will look like before I print?
A: You can preview your printout before printing by going to ‘File’ > ‘Print’ and then selecting ‘Print Preview.’ This will allow you to see how your worksheet will look when printed out. You can also adjust your print settings in this mode, such as margins, scaling, and orientation. Finally, you can print directly from the preview screen or cancel if you need to make any further adjustments.
Q: Can I change print settings for a specific printer?
A: Yes, you can change print settings for a specific printer. To do so, go to ‘File’ > ‘Print’ and then select ‘Printer Properties.’ This will display the printer properties dialog box, which allows you to adjust print settings specific to that printer, such as print quality, paper size, and duplex printing.