How to Setup Print Area in Excel

As an Excel user, you may need to print your data to share or present to your audience. But what happens if the data you want to print spreads across multiple rows and columns? Printing such data can be a nightmare and lead to a lot of confusion. Thankfully, Excel’s print area feature can help you print only the necessary data. In this blog post, we will provide a concise guide on how to set up print area in Excel.
Introduction
When you have a large amount of data in Excel, it can be a nightmare when it comes to printing. You don’t want to print the entire sheet with all its data, labels, and empty columns. It makes the document look cluttered and can be difficult to read. Excel’s print area feature can help you avoid this problem. In this guide, we will explain step-by-step how to set up print areas in Excel.
Step 1: Select the Data
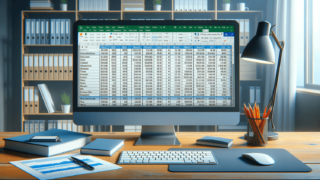
The first thing you need to do is select the data you want to print. For example, if you have a table with sales data, select the table by clicking and dragging your mouse over the cells that contain this information. Make sure you do not select any empty cells or unwanted information outside the table.
Step 2: Go to the Page Layout Tab
With your data selected, go to the Page Layout tab at the top of your Excel window. On the Page Layout tab, you will see a section called “Page Setup.” Look for the “Print Area” option, which is the fourth icon from the left.
Step 3: Set the Print Area
When you click on the “Print Area” icon, you’ll see a dropdown menu appear. From the dropdown menu, select “Set Print Area.” Your data is now set as the print area for your spreadsheet.
Bonus Tip: Print Titles Feature
It’s a good idea to use the “Print Titles” feature as well. This will make sure that column headers and row labels appear on each printed page, making it easier to understand the data. To set up these print titles, go to the Page Layout tab again and click on the “Print Titles” icon, which is the first from the left. You’ll see a popup box appear, allowing you to choose the rows and columns you want to repeat on each page. This feature is especially helpful when you have large tables to print.
Conclusion
Using print areas and print titles in Excel can help you to make sure that you are printing only the data that is necessary in a clean and organized way. Follow the steps outlined in this guide to set up your print area and enjoy a better printing experience in Excel.
Print Preview
Once you’ve set your print area, it is essential to check your print preview to confirm that everything is set up correctly. The preview function helps you to see whether your print area is going to fit on the page, and there are no empty cells. To access the print preview function, go to “File” and click on “Print Preview.” Here you can preview your document and make any necessary adjustments before printing.
Adjusting Margins and Scaling
Another way to ensure your print area fits on the page is by adjusting margins and scaling. If your data is too small or too large, the “Scaling” feature can be used to make changes. You can find this feature within Page Setup. The “Margins” feature can also be used to adjust the white space around your print area. To access the Margins section, go to the Page Layout tab, click on “Margins,” and select a margin size.
Custom Print Area and Printing Specific Pages
Excel allows you to create custom print areas for more specific data you want to print. If you want to print only certain columns, not all of them, select the specific columns and rows you need, follow the steps outlined above, and click on “Print Area,” then “Set Print Area.” You can then print only the custom print area using Print Preview.Additionally, Excel allows for specific page printing. If you have data across multiple different pages, you can select the page you want to print. To do this, select the “Page Setup” option from the Page Layout tab, then under “Page” click on the “Print Area” dropdown menu and select “Print Selected.” Here you can choose the specific page or the range of pages you want to print.
The print area feature in excel is an essential tool that allows you to print only the data that you want, making it easier to read and understand. In this guide, we’ve outlined how to set up print areas and print titles in Excel and how to preview and print custom areas. With all these tools available, you should be able to print your data looking exactly how you want with minimal hassle.
FAQ
Here are some of the most common questions people may ask when setting up print areas in Excel:
Can I modify the print area if I have already created it?
Yes, you can modify the print area by selecting the “Page Layout” tab and clicking on “Print Area” dropdown and choosing “Clear Print Area.” This will clear the current print area, and you can then select the new data to print and set a new print area.
Can I print a specific range of pages with print areas set up?
Yes, you can print a specific range of pages with print areas set up by selecting the “Page Layout” tab and clicking on “Print Area” dropdown, then choosing “Print Selection” and select the specific range of pages you want to print.
Can I set different print areas for different worksheets in one workbook?
Yes, you can set different print areas for different worksheets in one workbook. Open each worksheet separately, select the data you want to print, and follow the steps outlined in this guide to set up print areas.
What’s the difference between print area and print titles?
The print area is a specific selection of cells you want to print, while print titles are specific rows or columns that you want to repeat on each printed page. Print titles are commonly used for tables with many rows or columns to ensure that you can identify which columns or rows belong to different table values on each printed page.
What should I do if the Preview function indicates that my print area does not fit on the page?
If the preview function indicates that your print area does not fit on the page, you can adjust margins and scaling on the “Page Layout” tab to make your data fit on the page.