How to Freeze Top Two Rows in Excel

If you are working with a large dataset in Microsoft Excel, then you might need to scroll down to see the rows at the bottom of the sheet. However, this can make it difficult to read the top rows if they scroll out of view. In this blog post, we will show you how to freeze the top two rows in Excel so that they stay in place while you scroll through the rest of the sheet. This quick and easy Excel tip is perfect if you want to keep important information constantly visible while working on large spreadsheets.
Step 1: Select the Top Two Rows
The first step in freezing the top two rows in Excel is to select them. Simply click and drag the cursor over the top two rows of your spreadsheet. These rows should now be highlighted in a different color than the rest of the sheet, indicating that they have been selected.
Step 2: Go to the View Tab
Next, you will need to go to the View tab within Excel. This can be found at the top of the screen, along with other tabs such as Home and Insert.
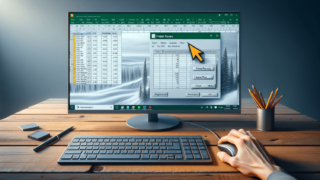
Step 3: Click on Freeze Panes
Within the View tab, you will see a section labeled “Window”. In this section, look for the “Freeze Panes” button and click on it. A drop-down menu will appear with several options for freezing rows or columns.
Step 4: Select the “Freeze Top 2 Rows” Option
From the drop-down menu, select the “Freeze Top 2 Rows” option. This will freeze the top two rows of your spreadsheet in place, allowing them to remain visible while you scroll through the rest of the sheet.
Step 5: Verify that the Rows are Frozen
Once you have selected the “Freeze Top 2 Rows” option, you should notice that the top two rows of your sheet remain visible even as you scroll down. You can verify that the rows are frozen by scrolling through the sheet and observing that the top two rows always remain in place.
Conclusion
Freezing the top two rows in Excel is a quick and easy way to keep important data visible while working on large spreadsheets. By following the steps outlined in this blog post, you can easily freeze the top two rows of your sheet and minimize the need for constant scrolling. With a little Excel know-how, you can make your work more efficient and productive. Happy spreadsheeting!
Why Freeze Top Two Rows in Excel?
Let’s say you have a spreadsheet with dozens of rows and columns of data. If you scroll down to view the data further down your sheet, you run the risk of losing the context of the data in the top two rows. Freezing the top two rows in Excel can help you ensure that you never lose sight of your important data. This technique is especially useful if you’re dealing with a workbook with many tabs, complex formulas, or just need an easier way to view critical information.
Alternatives to Freezing Top Two Rows in Excel
On a small spreadsheet, Excel’s freeze panes option might work perfectly for you. However, on a larger sheet, simply using the freeze panes option might not be enough to display the rows you want to see. You can use Excel’s split screen feature to freeze both rows and keep your scroll intact. Alternatively, for another way to view the information while working with your sheet, you can also utilize the “New Window” feature to enable a frozen view of your data in another window.
Unfreezing Rows and Panes in Excel
If you need to unfreeze your top rows or panes from your spreadsheet, you can follow the steps below:
- Go to the View tab in Excel
- Click on Freeze Panes
- Select Unfreeze Panes or Unfreeze Panes option from the drop-down menu.
By following these steps, you can quickly and easily unfreeze rows in your Excel sheet and continue working with your data as needed.
Freezing the top two rows in Excel can help you stay focused on the most critical data you require, especially while working on large spreadsheets. With just a few clicks, you can lock in place the rows that matter in your Excel workspace. Follow the steps outlined throughout this article, and you’ll be sure to keep a clear view of your data in even the largest spreadsheets!
FAQ
Here are some frequently asked questions about freezing top two rows in Excel:
Can I freeze more than two rows in Excel?
Yes, Excel allows you to freeze any number of rows and columns. Simply select the row or column below and to the right of the cells you want to freeze before you click the Freeze Panes option. All rows above and all columns to the left of your selection will freeze in place along with the cells you want to lock.
Can I lock rows and columns at the same time?
Yes, you can freeze both rows and columns simultaneously. To do this, select the cell below and to the right of the rows and columns that you want to lock in place and then click on the Freeze Panes option.
How do I know if my rows are frozen in Excel?
If you have frozen the top two rows in Excel, you can verify that they are frozen by simply scrolling down through the sheet. As you scroll, you should see that the top two rows always remain in place. Alternatively, Excel will show a light gray line below the row you have selected to signify it as the last row that is frozen, called the Freeze Panes bar.
Is it possible to freeze columns in Excel?
Yes, Excel allows you to freeze columns as well as rows. To freeze the first column in your worksheet, select the entire column to the right of the column you want to freeze and then click on the Freeze Panes option. This will freeze the first column so that it remains visible while you scroll through the rest of the sheet.
Can I undo freezing rows in Excel?
Yes, you can reverse the process of freezing panes in Excel by selecting View then Freeze Panes and then selecting “Unfreeze Panes.” This will unfreeze the selected row or column in your spreadsheet.