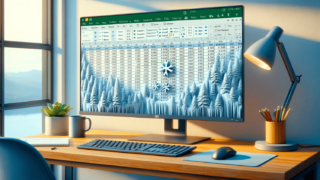

If you are someone who works with a lot of data in Microsoft Excel, you know the importance of efficiently navigating through large data sets. One helpful feature to make working with such data easier is being able to freeze rows or columns to keep them visible while you scroll through the rest of the spreadsheet. In this blog post, we will discuss how to freeze rows in Excel, step by step. Whether you are a seasoned Excel user or just getting started, this guide will help you master this useful skill.
Before diving into how to freeze rows in Excel, let us first understand what it means. Freezing rows in Excel means locking certain rows so they stay visible on-screen. So, no matter how far you scroll down, the frozen rows stay put and are always visible.
First, start by opening the Excel sheet that you would like to work on and navigate to the tab that you wish to freeze the rows.
Select the rows that you want to freeze. Click on the row number to select the entire row. You can also select multiple rows by holding the ‘Ctrl’ key and clicking on the row numbers/headings.
On the Ribbon Menu, click on the ‘View’ tab. You will see several options appear on the ribbon.
Click on the ‘Freeze Panes’ dropdown. It will reveal three options: Freeze Panes, Freeze Top Row, and Freeze First Column.
From the dropdown menu, click on ‘Freeze Panes’. Once you have done this, the rows that you selected will be locked in place, and only the rows below the selected rows will scroll.
If you want to unfreeze rows, you can always go back to the ‘View’ tab, click ‘Freeze Panes’ and then ‘Unfreeze Panes’.
Now that you know how to freeze rows in Excel, you can make navigating large Excel sheets much more manageable. Remember, you can always unfreeze rows if you want to readjust or change your view.
If you want to freeze multiple rows or columns, you can do so by selecting the cell where you want to freeze the rows and columns, or the intersection of the row and column where you want to freeze. For example, if you want to freeze the top two rows and the first two columns, you would select cell C3, and then navigate to the ‘View’ tab, click ‘Freeze Panes’, and then ‘Freeze Panes.’
If you are using Excel on a Mac, don’t worry, you can still freeze rows in the same way. Simply select the rows you want to freeze, go to ‘View’ on the Ribbon, select ‘Freeze Panes’ and then ‘Freeze Panes’ from the drop-down menu.
If you want to print a large Excel worksheet, you may want to freeze the rows or columns of the headings at the top of each section. To do this, you can go to the ‘Page Layout’ tab on the Ribbon and select ‘Print Titles.’ From here, you can choose whether to freeze rows or columns, and select which ones to freeze.
Freezing rows in Excel can be a real game-changer when working with large datasets. It makes it easier to see critical information when scrolling through the spreadsheet, and can help prevent costly mistakes by making sure you don’t miss any essential data. This feature can also help to reduce eye strain when working with a dense sheet and can be especially handy when printing Excel spreadsheets.
If you have trouble freezing rows in Excel, make sure that you have selected the entire row you want to freeze. If you are still experiencing issues, try saving the document and restarting Excel. If the issue persists, you can check the Microsoft Excel support website for further guidance and troubleshooting.
Freezing rows in Excel is one of the most convenient features that can help you work more efficiently. Whether you are working with complex datasets or just need to keep an eye on certain rows, this simple feature can make a significant difference in your Excel experience. With this guide, you should now be able to easily freeze rows in Excel, customizing your Excel experience to make it work for you.
Here are some commonly asked questions and answers about freezing rows in Excel:
Yes, you can freeze multiple rows in Excel. Simply select the rows you want to freeze, then go to the ‘View’ tab, click on ‘Freeze Panes’ and then select ‘Freeze Panes’ from the dropdown menu.
Yes, you can freeze columns in Excel. To freeze columns, select the column letter to the right of the last column you want to freeze, then go to the ‘View’ tab, click on ‘Freeze Panes’ and then select ‘Freeze Panes’ from the dropdown menu.
Yes, you can freeze both rows and columns in Excel. To freeze both rows and columns, select the cell at the intersection of the row and column where you want to freeze, then go to the ‘View’ tab, click on ‘Freeze Panes’ and then select ‘Freeze Panes’ from the dropdown menu.
Yes, you can freeze rows using Microsoft Excel Mobile. Open your spreadsheet, select the rows you want to freeze, then go to the ‘View’ tab, click ‘Freeze Panes’, and then ‘Freeze Panes’.
Yes, you can freeze rows on a specific sheet in a workbook using Excel. Simply open the sheet you want to freeze rows, select the rows you want to freeze, then go to the ‘View’ tab, click ‘Freeze Panes’, and then ‘Freeze Panes’ from the dropdown menu.
Explore the world of Microsoft PowerPoint with LearnPowerpoint.io, where we provide tailored tutorials and valuable tips to transform your presentation skills and clarify PowerPoint for enthusiasts and professionals alike.

Your ultimate guide to mastering Microsoft Word! Dive into our extensive collection of tutorials and tips designed to make Word simple and effective for users of all skill levels.

Boost your brand's online presence with Resultris Content Marketing Subscriptions. Enjoy high-quality, on-demand content marketing services to grow your business.