How to Freeze First Two Columns in Excel

Microsoft Excel is one of the most versatile and commonly used spreadsheet software in the world. It offers a wide range of features and functions that can help you manage and manipulate your data easily and efficiently. One such feature that comes in handy when dealing with large tables or datasets is the ability to freeze rows and columns. In this blog post, we will discuss how to freeze the first two columns in Excel, making it easier to navigate through the data even on a small screen.
Step 1: Open the Excel Spreadsheet
The first step is to open the Excel spreadsheet and select the range of cells that you want to freeze. In this case, you need to freeze the first two columns, so click on the cell that is located right below the first two columns.
Step 2: Click on the View Tab
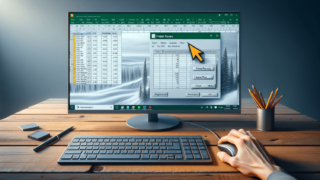
The second step is to click on the “View” tab, located in the top navigation bar of the Excel spreadsheet. This will reveal a number of view options that you can choose from.
Step 3: Select Freeze Panes
Under the “View” tab, locate the “Freeze Panes” option and click on it. Here, you will find various options unique to freezing rows and columns.
Step 4: Choose the First Two Columns
From the “Freeze Panes” dropdown, select the “Freeze First Two Columns” option. Now, the first two columns of your Excel spreadsheet are frozen and will remain visible regardless of how far you scroll to the right.
Step 5: Test the Frozen Columns
You can now test if the first two columns are actually frozen by scrolling horizontally to the right. The columns will stay in place while the other cells will move, giving you a quicker way to access information without switching between worksheets.
Unfreezing the First Two Columns
If you want to unfreeze the first two columns, go to the “View” tab and click on the “Freeze Panes” dropdown. Select “Unfreeze Panes” and the frozen columns will return to their normal scrolling behavior.
Conclusion
Congratulations! You now know how to freeze the first two columns in Excel. This feature comes in handy when you need to work with large datasets or tables. With just a few clicks, you can make your data more manageable and improve your productivity.
Tips for Working with Frozen Columns
Now that you’ve learned how to freeze the first two columns in Excel, there are some tips that you can use to improve your efficiency when working with frozen columns.
Tip #1: Freeze More Columns and Rows When Needed
If you’re working with larger datasets or tables, you may find that you need to freeze more rows or columns. Fortunately, Excel allows you to freeze up to the first 10 columns and 50 rows. Simply select the cell where you want the freeze to occur and use the “Freeze Panes” dropdown to choose the appropriate option.
Tip #2: Use Freeze Panes with Multiple Sheets
Freeze panes can also be used when working with multiple sheets. When you switch to another sheet and apply the freeze panes feature, it will apply to the entire workbook. This can be helpful when working with multiple sheets that require the same layout, such as invoices or reports.
Tip #3: Freeze Panes in Print Layout
When printing large tables or datasets, it can be helpful to have certain columns or rows frozen to maintain context as the reader moves from page to page. To do this, simply apply the Freeze Panes feature while in print layout view, and Excel will remember it every time you print the worksheet.
The Benefits of Freezing Columns in Excel
Freezing columns in Excel can have some significant benefits for its users:
Benefit #1: Easier to Navigate Large Datasets
Freezing the first two columns in Excel can be tremendously helpful when working with large datasets. Navigating through the columns is much more manageable when you have certain columns frozen and always visible to you.
Benefit #2: Maintaining Context When Scrolling
One of the most significant benefits of freezing columns is the ability to maintain context when scrolling horizontally. This is particularly useful when you have lots of columns, and it can be challenging to keep track of which column you’re looking at.
Benefit #3: Improved Productivity
By freezing columns, you can reduce the time required to navigate large datasets. You don’t have to keep scrolling left and right to find the columns you need. This improves your productivity by allowing you to work more efficiently.
Freezing the first two columns in Excel can be a massive time saver when working with large datasets or tables. The process is easy to implement, and with a few simple clicks, you can have your most important columns always visible. Hopefully, the tips and benefits provided in this article have helped you to become more efficient when working with Excel.
FAQ
Here are some frequently asked questions about freezing columns in Excel:
Q: Can I freeze more than two columns in Excel?
A: Yes, you can freeze up to ten columns in Excel, either to the left or right of the worksheet.
Q: Can I freeze rows and columns simultaneously?
A: Yes, you can freeze rows and columns simultaneously by selecting the cell that you wish to freeze both columns and rows from and choosing the “Freeze Panes” option.
Q: Can I freeze multiple columns, but not the first two?
A: Yes, you can freeze any column in Excel that you choose. Select the cell to the right of the last column you want to freeze and choose the “Freeze Panes” option.
Q: Does freezing columns affect the ability to sort data?
A: No, freezing columns does not affect the ability to sort data in Excel.
Q: Can I freeze columns when printing my worksheet?
A: Yes, you can freeze columns when printing your worksheet by applying the “Freeze Panes” feature while in print layout view. Excel will remember this every time you print the worksheet.