How to Change Page Margins in Excel

Welcome to our tutorial on how to change page margins in Excel. Excel is an essential tool for businesses and individuals alike for analyzing and managing data. Excel spreadsheets are frequently used for presentations, reports, and publications. Therefore, it is crucial to know how to format your document properly. One critical aspect of formatting is adjusting the page margins. Changing margins helps to align the text properly, making your document more presentable and readable. In this post, we will show you how to change page margins in Excel.
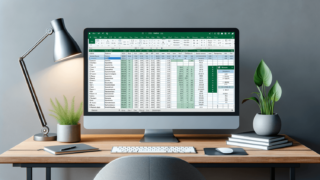
Step-by-Step Guide to Changing Page Margins in Excel
Changing page margins in Excel is a simple process, and you can do it using a few easy steps.
Step 1: Open your Excel document
Open the Excel document in which you want to change the page margins by double-clicking on the file. If you don’t have an Excel document, create a new one with the appropriate data.
Step 2: Navigate to the Page Layout tab
At the top of the Excel document, you’ll see several tabs. Click on the “Page Layout” tab that hosts options related to the page layout.
Step 3: Locate the Margins option
Navigate to the “Page Setup” group on the ribbon and click on the “Margins” drop-down arrow.
Step 4: Choose your preferred margin size
The “Margins” drop-down menu lists different preset margin sizes. Choose from “Normal,” “Wide,” “Narrow,” “Moderate,” or click on “Custom Margins” to create your margin configuration.
Step 5: Apply the new page margins
Once you have selected your preferred margin size, click on “Custom Margins…” to apply the new page margins.
Congratulations, you have successfully changed your page margins in Excel in a few easy steps. You can now create a more presentable and structured excel document for your presentations, proposals, or any other projects.
Why Changing Page Margins in Excel is Important
Changing page margins improves readability and gives your excel doc a more professional appearance. Here are a few reasons why you should consider changing page margins when creating an Excel spreadsheet:
Improved Readability
Having wider margins increases the white space in your document, which provides a better reading experience. Additionally, it also helps avoid cluttered and cramped excel documents.
Professional Appearance
A well-structured and professionally formatted Excel document can make all the difference. By adjusting your page margins, you can present a clear and concise document that looks great and is easily accessible.
Overall, adjusting page margins can help you optimize your Excel documents to be more appealing, organized, and straightforward, making it easy for readers to navigate. It allows you to create well-structured and professional worksheets, which enhances your data analysis and presentation capabilities.
How to Set Custom Margins in Excel
If the preset margin sizes do not meet your needs, you can create a custom margin. To do this, follow these steps:
Step 1: Open your Excel document
Open the Excel document you want to adjust the margins for.
Step 2: Navigate to the Page Layout tab
Click on the “Page Layout” tab located on the Excel toolbar.
Step 3: Choose Custom Margins
In the “Page Setup” group, click on the “Margins” drop-down arrow and select “Custom Margins.”
Step 4: Set up your custom margins
Enter your desired margin sizes in the “Top,” “Bottom,” “Left,” and “Right” text boxes. In the preview section, you can see how the margins will look before applying them.
Step 5: Apply the custom margins
Once you have configured the margins, click “OK” to apply them to your Excel document.
Using Narrow Margins for Printing
If you want to print your Excel document, you may need to adjust the margins to ensure that they fit within the printing page. Narrow margins work well for printing, and it is easy to adjust them in Excel:
Step 1: Open your Excel document
Open the Excel document you want to adjust the margins for.
Step 2: Navigate to the Page Layout tab
Click on the “Page Layout” tab located on the Excel toolbar.
Step 3: Choose Narrow Margins
In the “Page Setup” group, click on the “Margins” drop-down arrow and select “Narrow.”
Step 4: Adjust the Page Setup
After selecting “Narrow,” review the other options on the “Page Layout” tab to ensure your Page Setup fits your printing needs.
Knowing how to change margins is essential when working in Microsoft Excel. It enhances the look and readability of your worksheets, presentations, and reports, and it is a simple process that can be accomplished using a few easy steps. You can select preset margins or create custom margins to suit your needs. We hope our guide has helped you to master the use of margins in Excel
FAQs
Here are some frequently asked questions regarding changing page margins in Excel:
How can I reset the page margin to the default setting?
To reset the page margins to their default settings, open your Excel document. Navigate to “Page Layout” tab and click on the “Margins” drop-down box. Select “Normal.”
Can I adjust the page margins for specific worksheets in a workbook?
Yes, you can adjust the page margins for specific worksheets in a workbook. However, you need to apply the changes to each worksheet separately.
What is the minimum margin size I can choose in Excel?
The minimum margin size in Excel is 0.05 inches. However, note that adjusting margins to an extremely narrow size may lead to cut off or overlap text.
What should I do if the margin settings are not showing up correctly?
If the margin settings are not showing up correctly, your Excel may be in Page Break Preview mode. You can check by going to the “View” tab, and if the “Page Break Preview” box is checked, uncheck it. Then, navigate back to the “Page Layout” tab to adjust your margins settings correctly.
Why is changing page margins important in Excel?
Changing page margins in Excel is crucial for creating well-structured, easy-to-read, and professional-looking documents. It helps to avoid clutter and improves the readability of your document for your target audience.