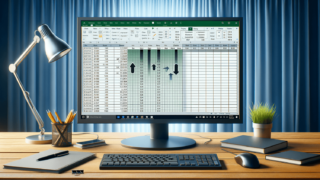
How to Switch Row and Column in Excel Chart

If you are a regular user of Microsoft Excel, you may have come across instances where you need to switch the rows and columns in your chart for a better visual representation of data. Switching the rows and columns is a simple process that can make a significant difference in the clarity of your chart and make it easier to understand. In this blog post, we will take you through a step-by-step guide on how to switch row and column in Excel chart.
Introduction
Excel charts are an excellent way to display data visually. A good chart can convey information much more effectively than a table, making it easier for users to understand the data. However, sometimes the row data in a chart does not display the data the way we want. In such a situation, you can quickly switch the row and column in your Excel chart. In this blog post, we will explain the easy steps to switch row and column in excel chart.
Step 1: Select Your Chart
The first step is to select the chart you want to modify. Once you have located the chart, click on it to select it.
Step 2: Open the Select Data Dialog
Right-click on the chart and choose the “Select Data” option to open the Select Data Source dialog. This dialog allows you to change the chart’s data source and modify the rows and columns used in the chart.
Step 3: Modify the Rows and Columns
In the Select Data Source dialog, you will see two sections, “Legend Entries (Series)” and “Horizontal (Category) Axis Labels.” To switch the row and column in your chart, you need to switch the data listed in these two sections. To do this, click on the “Switch Row/Column” button.
Step 4: Review Your Chart
After switching rows and columns, you should review your chart to see how it looks. In some cases, you might need to make additional modifications to the chart to make it look better.
Step 5: Save Your Changes
After you have made all the necessary changes to your chart, you should click the “OK” button to save these changes. Your Excel chart will now display data with rows and columns switched.
By following these simple steps, you can easily switch row and column in Excel chart to better display data. Excel is a powerful tool for data visualization, and with a few adjustments, you can create charts that are easy to read and understand. Be sure to experiment with different chart types and formatting options to create a chart that perfectly suits your needs.
Why You Might Need to Switch Row and Column in Excel Chart
There are various reasons why you might need to switch row and column in Excel chart. Sometimes the data in rows doesn’t make sense in the context of a chart, or you may need to compare data points from different columns. By switching the rows and columns, you can make data easier to understand and more visually appealing.
Additional Tips for Chart Editing
Excel provides many options for customizing charts, including adding titles, legends, labels, and formatting options. Here are a few additional tips to keep in mind when editing your chart:
Add Titles and Labels
To make your chart easier to understand, you may want to consider adding titles and labels if the original data does not include them. In Excel, you can add titles for the chart and axes as well as data labels that display values for each data point.
Use Color and Formatting
Excel provides many options for customizing the colors and formatting of your chart, making it easier to represent data visually. You can use different colors for different data points or series, adjust the thickness of lines, and change the appearance of markers and shapes.
Choose the Right Chart Type
There are many types of charts to choose from in Excel, including pie charts, line charts, column charts, and bar charts. Choosing the right type of chart is important for displaying the data effectively. For example, if you want to show a comparison of values, a bar chart might be the best option, while a line chart is suitable for showing trends over time.
Switching row and column in Excel chart is a straightforward process that can make a big difference in the visual appeal of your data. By following the easy steps outlined in this post, you can quickly switch rows and columns in your chart and customize it to better represent your data. Don’t be afraid to experiment with different chart types or formatting options to find the perfect fit for your needs. With a little practice and creativity, you can create stunning charts that are both easy to read and understand.
FAQ
Here are some commonly asked questions about switching rows and columns in Excel charts:
Can I switch rows and columns in an Excel chart that is part of a larger report or presentation?
Yes. If the chart is part of a larger report or presentation, you can easily switch the rows and columns in the chart without affecting the formatting of the rest of the document. Simply follow the same steps outlined in this post to switch the rows and columns in your chart.
What if I want to switch the rows and columns in a specific section of the chart?
If you want to switch the rows and columns in a specific section of the chart, you need to modify the data source for that section. Select the section and go to Select Data, select the data series you want to modify the order of and click on Edit. Here you can edit the values for series and the category axis with different settings.
Will switching the rows and columns affect my data?
No, switching the rows and columns in an Excel chart will not affect your data. It only affects how the data is displayed in your chart. Your original data will remain the same.
What if I don’t like how the chart looks after switching the rows and columns?
If you don’t like how the chart looks after switching the rows and columns, you can always revert to the original view by following the steps again. Alternatively, you can customize the chart further by changing its colors, adding labels and titles, or adjusting the chart type.
Can I switch rows and columns in other Microsoft Office applications?
Yes. You can switch rows and columns for charts in other Microsoft Office applications, such as PowerPoint and Word, by following similar steps to those outlined in this post. Simply select the chart, select the data series and edit the data source in the same way.