


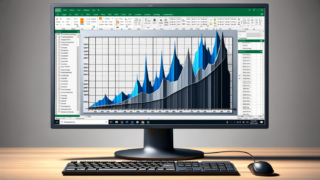


Printing lines in Excel can help to improve the readability and organization of your data. It is a simple feature that allows you to display gridlines and borders around the cells of your worksheet, making it easy to see where one set of data ends and another begins. In this blog post, we will provide a step-by-step guide on how to print lines on Excel, so that you can improve the visual presentation of your data in a professional and efficient manner.
Printing lines on Excel can enhance the presentation of your data and give your worksheet a more professional look. In this blog post, we will provide a step-by-step guide on how to print lines on Excel.
Open the Excel worksheet that you want to print. If you have not created a worksheet yet, create one by choosing ‘New’ from the ‘File’ menu and selecting ‘New Workbook’.
Select the whole worksheet or the area of the worksheet that you want to print by clicking on the ‘Select All’ button in the top left-hand corner of the worksheet. This button is located above the row number and to the left of the column letter.
Next, switch to the ‘Page Layout’ tab. This can be found at the top of the ribbon towards the middle of the Excel window.
Under the ‘Page Layout’ tab, select the ‘Gridlines’ check box. This will show the gridlines on your Excel worksheet.
Select ‘Print Preview’ from the ‘File’ menu to see how the worksheet will look when it is printed. The gridlines should now be visible on your worksheet. If they are not, go back to step 4 and make sure that the ‘Gridlines’ box is checked.
Once you are satisfied with how the worksheet looks in print preview, select ‘Print’ from the ‘File’ menu. This will print the worksheet and include the gridlines that you have selected.
If you want to modify the settings of the gridlines, you can do so by selecting ‘Page Layout’ from the ribbon and then clicking on ‘Page Setup’. From here you can customize the style and color of your gridlines.
Printing lines in Excel is a simple and easy way to improve the visual presentation of your data. By following these simple steps, you can quickly and efficiently add gridlines to your Excel worksheet.
Here are some additional tips that can help you to print lines in Excel even more efficiently:
Before printing your Excel worksheet, make sure that your printer settings are correct. For example, you should check the orientation, paper size, and margins to ensure that they are set up correctly for your printer. This will help to prevent any printing issues and ensure that the lines show up clearly on the printed worksheet.
If you want to create a stronger visual separation between cells, you can use borders in addition to gridlines. Borders can be customized to be thicker or thinner than the default gridlines, and can be applied to only certain cells or ranges of cells.
If you are concerned about using too much ink when printing gridlines and borders, you can change the color of the lines to a lighter color than black. This will still provide a visual separation between cells, but will use less ink and save you money over time.
Printing lines on Excel is a quick and easy way to improve the visual presentation of your data. By following the above steps, you can easily add gridlines to your Excel worksheet and create a more professional-looking document. Remember to experiment with different printing options and customizations to find the settings that work best for your needs.
Here are some frequently asked questions about printing lines on Excel:
A: Yes, you can select only the cells or range of cells that you want to include gridlines for before printing. Simply highlight the desired cells and follow the above steps to print the worksheet.
A: Yes, you can customize the style and color of your gridlines. Under the ‘Page Layout’ tab, click on ‘Page Setup’, and then select the ‘Border’ tab. From here, you can customize the style, color, and thickness of the gridlines.
A: Make sure that you have selected the ‘Gridlines’ box under the ‘Page Layout’ tab, and that your printer settings are correct. Also, check your printer ink levels to ensure that there is enough ink to print the gridlines. If the issue persists, try restarting your printer and computer, and printing the worksheet again.
A: Yes, you can turn off the gridlines for print preview by selecting ‘Print Preview’ from the ‘File’ menu, and then clicking on ‘Page Setup’. In the ‘Sheet’ tab, unselect the ‘Print’ box under ‘Gridlines’.
A: Yes, you can include gridlines in an Excel table by selecting the table and then under the ‘Table Tools’ tab, selecting ‘Design’, and then checking the ‘Header Row’, ‘Total Row’, and ‘Banded Rows’ checkboxes under the ‘Table Style Options’ section. This will show gridlines in your entire table.
Explore the world of Microsoft PowerPoint with LearnPowerpoint.io, where we provide tailored tutorials and valuable tips to transform your presentation skills and clarify PowerPoint for enthusiasts and professionals alike.

Your ultimate guide to mastering Microsoft Word! Dive into our extensive collection of tutorials and tips designed to make Word simple and effective for users of all skill levels.

Boost your brand's online presence with Resultris Content Marketing Subscriptions. Enjoy high-quality, on-demand content marketing services to grow your business.


