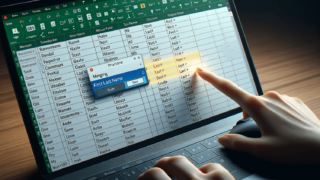

If you are looking for straightforward guidance on how to print address labels in Microsoft Excel, you have come to the right place. Whether you need to generate labels for a mass mailing, shipping, or simply organizing your office, Excel provides a convenient and efficient solution for printing address labels. In this blog post, we will walk you through the step-by-step process of creating and printing address labels from your Excel spreadsheet. By following our simple instructions, you can quickly produce customized labels that look professional and save you time.
The first thing you need to do is set up your Excel spreadsheet. Start by opening a new blank workbook in Excel and enter the recipient’s name, company, address, and any other necessary information into separate cells. Make sure to use separate cells for each piece of information to ensure that they will be easily formatted into labels later. Also, make sure that you have included all the necessary information to avoid any confusion when printing.
Excel offers various label templates that you can choose from to make the process easier. Click on the “Mailings” tab and select “Labels” in the “Create” group. In the “Labels” tab, choose the appropriate “Label vendors” and “Product number” that match the label size you will be using. If you don’t know the label size, look at the packaging or do a quick online search for the specifications.
Now it’s time to choose which recipient’s information you want to use for printing labels. Make sure that all the information you want to include in the label is in a single row or column. Highlight the cells containing the information and select the “Insert Merge Field” option to add the fields to your label template.
After you have added all the necessary fields, preview your labels to make sure they look just the way you want them to. Click on the “Preview Results” button in the “Mailings” tab to see how your labels will look. If everything looks good, hit the “Finish & Merge” button and select “Print Documents” to start printing.
Printing address labels in Excel is quick and easy when you know how to do it. By following this simple step-by-step guide, you can have your labels printed in no time at all. Feel free to experiment with different templates and designs to make your labels look even more professional and eye-catching.
Even with the best preparation, things can sometimes go wrong during the label printing process. Here are some common issues people face while printing, along with their solutions:
If your label text is cut off, go to Page Setup and adjust the margins to fit your label size. You can also try changing the font size or reducing the number of lines of text associated with each recipient.
If your labels are misaligned, check that the printer is loaded with the correct label sheet. Some printers also offer a manual feed option, which can sometimes solve the problem. If misalignment persists, go back to Step 2 and choose a different template that perfectly matches your label size and specifications.
If you’re seeing duplicate labels printing, double-check that you only have one copy of the recipient’s information in your Excel spreadsheet. In the “Mailings” tab, also check that the “Duplicate” option is not selected.
Excel provides many options for customizing your labels to suit your specific needs. Here are some tips for making your labels stand out:
Printing address labels in Excel is an easy and versatile process that can save you time and money. By following these simple steps and troubleshooting tips, you can create customized labels that look professional and match your branding. Don’t be afraid to experiment with different templates and design elements to make your labels unique and eye-catching. With Excel, printing address labels has never been more straightforward, so give it a try and streamline your mailing or shipping process today!
Here are some frequently asked questions about address label printing in Excel:
Yes, you can! In the “Mailings” tab, select “Labels,” and in the Label Options dialog box, select “Full page of the same label.” Under “Print,” choose “Single label” and enter the row and column coordinates of the cell containing the information for the first label you want to print. Repeat this process for the remaining labels.
Yes, you can. Copy and paste the recipient information into separate cells and ensure that each piece of data is in a different cell. Check to make sure you don’t accidentally include multiple lines in one cell. If you do, your text may spill over into another label, or the label text may be cut off.
In the “Mailings” tab, select “Labels,” and in the Label Options dialog box, choose the appropriate label vendor and product number to match your label sheet. Select “New Label” and input your custom label dimensions. Once you’ve created your custom label, insert text boxes and images as necessary from the “Insert” tab to make your customized labels.
Most printers can print labels, but laser printers are typically better suited for this task. Laser printers have a higher print resolution and can handle larger print runs more efficiently. Inkjet printers can also print labels but may not be as durable as laser labels since ink can sometimes smudge or blur.
Yes, there are tons of free templates available online. Many of them are compatible with Excel and can be easily customized to fit your specific needs. Some popular websites for finding label templates include Microsoft Office, Avery, and WorldLabel.
Explore the world of Microsoft PowerPoint with LearnPowerpoint.io, where we provide tailored tutorials and valuable tips to transform your presentation skills and clarify PowerPoint for enthusiasts and professionals alike.

Your ultimate guide to mastering Microsoft Word! Dive into our extensive collection of tutorials and tips designed to make Word simple and effective for users of all skill levels.

Boost your brand's online presence with Resultris Content Marketing Subscriptions. Enjoy high-quality, on-demand content marketing services to grow your business.