
Are you looking for a way to keep specific rows or columns visible while scrolling in Microsoft Excel? Freezing panes is a useful feature that allows you to achieve this. By freezing panes, you can keep essential data, such as headers or totals, in sight while navigating through a large spreadsheet.
This blog post will provide step-by-step instructions on how to freeze panes in Excel. Whether you’re a beginner or an experienced user, these instructions will help you easily implement this useful feature in your spreadsheets.
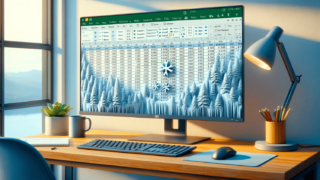
Microsoft Excel is a user-friendly software that offers numerous features designed to save time and make working on spreadsheets easier. One of these features is freezing panes, which enables you to easily keep specific rows or columns visible while scrolling through your data. In this blog post, we will discuss how to freeze panes in Excel and its benefits.
Before you can freeze panes, you must first open the Excel spreadsheet you want to work on.
To freeze panes in Excel, you need to select the specific row or column that you want to keep in sight. If you want to freeze the top row, select the row directly below it. For instance, if you want to freeze rows 1 to 4, select row 5.
Once you’ve selected the row or column in question, proceed to the View tab. The View tab contains all the settings and options necessary to manage or manipulate your spreadsheets.
Under the View tab, click on the “Freeze Panes” icon located in the “Window” section. The dropdown menu will present you with different options depending on your needs. Select the one that fits your requirements.
After choosing the “Freeze Panes” option, Excel will freeze your selected rows or columns. You will notice that as you scroll through your spreadsheet, your frozen data remains visible at the top or side of your window, depending on your selection.
Freezing panes in Excel prevents loss of data by helping you keep a clear view of your important data, no matter how long your spreadsheet is. This helps you avoid repetitive scrolling and enables you to focus on essential information regardless of how large your spreadsheet is.
Freezing panes in Excel enables you to navigate and scroll through your data with ease as you can keep all your important headers visible. This saves you the time and stress of trying to remember which data belongs in which column, as you have the column names accessible at all times.
Freezing panes in Excel can also come in handy in collaborative settings or during presentations. By freezing panes, you can eliminate the need to repeatedly scroll through your data or switch between worksheets, enabling you to focus on delivering your presentation or data to your audience.
Freezing multiple rows or columns in Excel can be done by selecting the row or column where you want the freezing to begin and then following the steps for freezing panes as outlined above.
For instance, if you want to freeze the first two rows and the first column, you would select cell B3, then follow the steps of freezing panes as described above, and select either Freeze Panes, Freeze Top Row, or Freeze First Column, depending on your needs.
To unfreeze panes, follow the steps below:
Open the worksheet you want to unfreeze, then click on the View tab.
Under the Window group, you will see the Freeze Panes icon. The icon you selected when freezing the panes will now be highlighted.
Click on the Freeze Panes icon in the Window group, then select the Unfreeze Panes option.
In conclusion, freezing panes in Excel can save you a lot of time and effort when working on large spreadsheets. By implementing the simple steps outlined in this guide, you can easily freeze and unfreeze your panes, making working in Excel both quicker and more comfortable.
Remember, if you have any questions or run into any issues, check out Microsoft’s support center for further resources. Also, don’t be afraid to experiment with Excel’s other features to see how they can help you work more efficiently.
Here are some frequently asked questions about freezing panes in Excel and their corresponding answers:
If you freeze the wrong row or column or want to unfreeze them, all you need to do is go to the “View” tab, locate the “Freeze Panes” icon, select it, and then select either the “Unfreeze Panes” option or the option that corresponds to the correct rows or columns you want to freeze.
Yes, you can freeze multiple rows and columns in Excel. To do so, select the cell at the intersection point of the rows and columns you want to freeze, then follow the steps to freeze panes as outlined above.
No, freezing panes only applies to the worksheet you are currently working on. However, you can copy the frozen data to another worksheet, then freeze panes there.
No, you cannot freeze individual cells within a row or column. However, you can split the worksheet into different sections then freeze the necessary panes.
Yes, freezing panes is a persistent feature in Excel, meaning that once you save a spreadsheet with frozen panes, the panes will remain frozen even after you close and reopen the file.
Explore the world of Microsoft PowerPoint with LearnPowerpoint.io, where we provide tailored tutorials and valuable tips to transform your presentation skills and clarify PowerPoint for enthusiasts and professionals alike.

Your ultimate guide to mastering Microsoft Word! Dive into our extensive collection of tutorials and tips designed to make Word simple and effective for users of all skill levels.

Boost your brand's online presence with Resultris Content Marketing Subscriptions. Enjoy high-quality, on-demand content marketing services to grow your business.