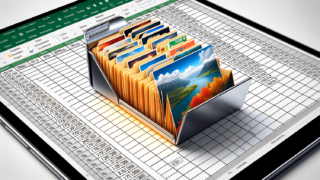
How to Insert a Picture into Excel
If you are looking for a quick and easy way to add pictures to your Excel spreadsheets, this post is for you. Microsoft Excel offers various options to include images from your computer or the internet, which can help improve the visual appeal of your spreadsheets and convey information in a more engaging way. In this post, we will cover the steps required to insert a picture into Excel, including how to resize, move, and format it to fit your needs. Whether you’re a beginner or an advanced Excel user, this guide will help you add pictures to your spreadsheets like a pro.
Why Add Pictures to Excel?
Excel is a powerful tool for organizing data, but adding visual elements like pictures can help make your spreadsheets even more effective. Whether you want to showcase product images, include charts and graphs, or simply add a personal touch to your work, inserting pictures into Excel is a great way to enhance your data presentation.
How to Insert a Picture into Excel
There are several ways to add pictures to your Excel spreadsheet. Here are the steps to follow:
Option 1: Insert a Picture from Your Computer
1. Click on the cell where you want to insert the picture.
2. From the Insert tab on the ribbon, select Pictures.
3. Browse to the location on your computer where the image is stored.
4. Select the image and click Insert.
5. The image will be inserted into the cell you selected, and you can drag it to reposition it as needed.
Option 2: Insert a Picture from the Internet
1. Click on the cell where you want to insert the picture.
2. From the Insert tab on the ribbon, select Pictures.
3. Click Online Pictures to search for images online.
4. Enter a keyword or phrase to search for images related to your data.
5. Select the image you want to insert into your Excel spreadsheet and click Insert.
Formatting and Adjusting Pictures in Excel
Once you’ve inserted a picture into Excel, you can format and adjust it as needed. Here are some options:
Resize Pictures in Excel:
To resize a picture in Excel, simply click and drag one of the corner handles until you get the desired size.
Move Pictures in Excel:
To move a picture in Excel, simply click and drag it to the desired location within the cell or to a different cell entirely.
Format Pictures in Excel:
To format a picture in Excel, you can use the Picture Tools Format tab that appears when you click on the picture. This includes options to adjust the brightness, contrast, and color of the image, as well as add effects like shadows and reflections.
Adding pictures to Excel is a great way to enhance your data presentation and make your spreadsheets more engaging. By following these simple steps and using the formatting tools available in Excel, you can easily add images to your work and create dynamic spreadsheets that stand out.
Tips for Using Pictures in Excel
Here are some tips for effectively using pictures in your Excel spreadsheets:
Consider the File Size
While pictures can enhance your spreadsheet, it’s important to consider the file size. Large files can slow down your spreadsheet, making it difficult to work with. Optimize your images before insertion using editing software or online image compression tools.
Use High-Quality Images
To ensure your pictures look great in Excel, use high-quality images. Low-quality images can appear blurry or pixelated, reducing the overall impact of your spreadsheet.
Organize Your Pictures
If you are using multiple images in your Excel spreadsheet, it’s important to organize them in a logical manner. Consider creating a separate folder for your images and naming them in a consistent manner for easy reference.
Use Picture Borders
Adding borders around your pictures can help them stand out in the spreadsheet and make them easier to view. To add a border, select the picture and click on the Picture Tools Format tab. From there, choose the Picture Border option and select the desired border style and thickness.
Consider Using Charts and Graphs
While pictures can be a great addition to spreadsheets, you may also want to consider using charts and graphs to convey complex data in a visual way. Excel offers a range of chart types to choose from, including column, line, pie, and bar charts.
Inserting pictures into Excel is a straightforward process that can add a lot of value to your spreadsheets. By following these simple steps, you can easily include images in your work and create engaging and effective presentations.
Frequently Asked Questions
Here are some frequently asked questions about inserting pictures into Excel:
Can I insert more than one picture into a cell in Excel?
No. You can only insert one picture per cell in Excel. However, you can place pictures in multiple cells to create the desired effect.
Can I resize a picture without distorting it in Excel?
Yes. To resize an image without distorting it, hold down the Shift key while resizing the picture from one of the corners. This will maintain the aspect ratio of the image and keep it from becoming distorted.
Can I insert pictures into Excel on a Mac?
Yes. The process for inserting pictures in Excel is the same on a Mac as it is on a Windows-based PC.
What file formats are supported for pictures in Excel?
Excel supports several image file formats, including JPEG, PNG, BMP, and GIF. You can also insert SVG (Scalable Vector Graphics), but they may not appear as sharp or vibrant as other image formats.
Can I include pictures in Excel even if I’m not good at design?
Yes. Excel offers a range of formatting options that can help you enhance your images, even if you are not an experienced designer. With a little practice and experimentation, you can create engaging and effective spreadsheets that make use of images to convey information in a more engaging way.