How to Apply Gradient Fill in Excel
To apply a gradient fill to a cell in Excel, select the cell, press Ctrl+1 to open Format Cells, go to the Fill tab, click Fill Effects, choose two colors and a shading style, then click OK twice. For charts and shapes, right-click the object, choose Format, and pick Gradient Fill in the Fill section of the Format pane.
Welcome to our tutorial on how to apply gradient fill in Microsoft Excel, one of the most popular spreadsheet applications worldwide. Gradient fill is a versatile feature that enables you to add depth, texture, and style to your cells and charts by blending two or more colors smoothly. Whether you want to highlight data patterns, create data bars, or design a custom theme, gradient fill can help you achieve your goals effectively and efficiently. In this post, we will walk you through the steps to apply gradient fill to your Excel sheets and charts, including the options, settings, and tips you need to know to make the most of this feature.
Before You Apply Gradient Fill: Understanding the Basics
Before we dive into the details of how to apply gradient fill in Excel, let’s briefly review the basics. Gradient fill is a formatting option that allows you to fill a cell or chart element with a smooth transition of colors from one end to another, using a gradient type, direction, angle, and stops. In Excel, you can use gradient fill to create a wide range of effects, such as data bars, heat maps, backgrounds, and more. There are several types of gradients available, including linear, radial, rectangular, and path gradients, each with its own pros and cons. You can also use predefined gradient styles or create your custom gradients by selecting colors, adjusting the gradient stops, and exploring the options offered by Excel.
Step-by-Step Guide: How to Apply Gradient Fill in Excel
Step 1: Select the Cell or Chart Element
The first step in applying gradient fill in Excel is to select the cell or chart element you want to format. You can select one or multiple cells, ranges, or chart elements at once. To select a cell, click on it once. To select multiple cells, drag the cursor over the cells you want to format or hold down the Ctrl key while clicking on each cell. To select a chart element, such as a series, chart area, or plot area, click on it once, and Excel will highlight it with a blue border.
Step 2: Choose the Gradient Fill Option
Once you have selected the cell or chart element, navigate to the Home tab on the Excel ribbon. Look for the Fill button in the Font group, and click on the drop-down arrow next to it. You should see several fill options, including solid fill, gradient fill, picture or texture fill, and more. Click on the Gradient Fill option, and Excel will open the Format Cells or Format Data Series dialog box, depending on the context.
A quick note for worksheet cells specifically: the Home tab Fill button only applies a solid background color. To put a true gradient inside a cell, press Ctrl+1 (or right-click and choose Format Cells), open the Fill tab, and click the Fill Effects button. The Fill Effects dialog is where you pick your two colors and a shading style for cells. Charts, shapes, and other drawing objects, on the other hand, use the Format pane’s Gradient Fill option described above.
Step 3: Select the Gradient Type
Once you have opened the Gradient Fill dialog box, you can select the gradient type you want to use. Excel offers four types of gradients: linear, radial, rectangular, and path. To select a gradient type, click on the corresponding radio button or thumbnail image. You can preview the gradient effect in the preview section of the dialog box as you select different types.
Step 4: Choose the Gradient Direction, Angle, and Stops
Once you have selected the gradient type, you can further customize the gradient effect by choosing the direction, angle, and stops. The direction determines how the gradient fills the cells, from top to bottom, left to right, or at an angle. The angle sets the degree of the gradient rotation, from 0 to 360 degrees. The stops define the colors and transparency of the gradient, from the start color to the end color.
Step 5: Preview and Apply the Gradient Fill
Once you have set the gradient options, you can preview the effect in the preview section of the dialog box. If you are happy with the result, click on the OK button to apply the gradient fill to the selected cells or chart elements. If you want to cancel the changes, click on the Cancel button to revert to the previous state.
Tips and Tricks for Using Gradient Fill in Excel
Tip #1: Use Gradient Fill for Conditional Formatting
One of the most powerful applications of gradient-style fills in Excel is conditional formatting color scales. You can use a color scale to highlight data patterns, variances, and trends, based on predefined or custom rules and thresholds. For example, you can use a red and green gradient fill to show cells that are below or above the average value, or a blue and white gradient fill to show cells that contain negative or positive numbers. Conditional formatting can help you visualize your data quickly and intuitively, without the need for complex charts or graphs.
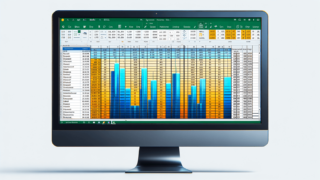
Tip #2: Use Gradient Fill for Charts and Maps
Another useful application of gradient fill in Excel is for creating charts and maps. You can use gradient fill to add colors, depth, and definition to your charts’ data series or to highlight specific regions or territories in your maps. For example, you can use a rainbow gradient fill to show the differences in temperature across a country, or a green to yellow gradient fill to show the population density of different cities. Charts and maps can help you communicate your data insights visually and comprehensively, and gradient fill can play a critical role in enhancing their impact.
Tip #3: Use Custom Gradients for Branding and Design
If you want to go beyond the standard gradient fill options offered by Excel, you can create your custom gradients and themes. By selecting your colors, adjusting the gradient stops, and playing with the gradient parameters, you can create unique and personalized designs for your reports, presentations, or dashboards. Custom gradients can help you reinforce your brand identity, express your creativity, and make your work stand out from the crowd.
When to Avoid Gradient Fill in Excel
While gradient fill can be a great tool for enhancing your reports and presentations, there are some situations where you should avoid using it. For example, gradient fill can make your data hard to read and interpret if there are too many colors or shades, or if the color contrast is low. Additionally, gradient fill can make your file size larger, which can slow down your spreadsheet’s performance or make it difficult to share or store. If you need to create a simple and clean worksheet, or if you have limited bandwidth or storage, consider using solid fill or other formatting options instead of gradient fill.
How to Modify and Remove Gradient Fill in Excel
If you have applied gradient fill to your cells or chart elements and want to modify or remove it, follow these steps:
Modify Gradient Fill:
- Select the cells or chart elements that have the gradient fill you want to modify.
- Go to the Home tab on the Excel ribbon and click on the Fill button in the Font group.
- Choose the Gradient Fill option from the drop-down menu.
- Adjust the gradient type, direction, angle, and stops as desired.
- Preview the changes in the preview section and click OK to apply the new gradient fill or Cancel to revert to the previous state.
Remove Gradient Fill:
- Select the cells or chart elements that have the gradient fill you want to remove.
- Go to the Home tab on the Excel ribbon and click on the Fill button in the Font group.
- Choose the No Fill option from the drop-down menu.
- Excel will remove the gradient fill from the selected cells or chart elements.
Wrapping Up
Gradient fill is a powerful and flexible feature that can help you create stunning visual effects in Excel. Whether you want to highlight data patterns, create data bars, design custom themes, or visualize maps and charts, gradient fill can be your ally. By following the steps and tips outlined in this tutorial, you can apply gradient fill to your Excel worksheets and charts with confidence and ease. However, don’t forget that gradient fill is not always the best option for every situation, and that modifying or removing gradient fill is also essential to keep your worksheets clean and efficient. Experiment with gradient fill and explore its possibilities, but always keep your data clarity, readability, and performance in mind.
FAQs About Applying Gradient Fill in Excel
Here are some frequently asked questions about applying gradient fill in Excel, along with their concise answers:
Q: Can I apply gradient fill to a single cell in Excel?
A: Yes, you can apply gradient fill to a single cell in Excel by selecting the cell and choosing the Gradient Fill option from the Fill drop-down menu. Then, you can customize the gradient type, direction, angle, and stops to your liking.
Q: How many gradient stops can I use in Excel?
A: You can use up to 16 gradient stops in Excel for each gradient fill. Each gradient stop defines the color, transparency, and position of a specific point on the gradient, from the start color to the end color. You can add, delete, or modify the gradient stops in the Gradient Fill dialog box until you achieve the desired effect.
Q: Can I apply gradient fill to worksheet backgrounds in Excel?
A: Not directly. Excel’s worksheet background (Page Layout tab > Background) only accepts an image, not a gradient, and it does not print. To get a gradient look behind your data, the common workaround is to select the cell range and apply a gradient through Format Cells > Fill > Fill Effects, or to use a conditional formatting color scale across the range.
Q: Is gradient fill compatible with Excel’s conditional formatting?
A: Yes. Excel’s conditional formatting includes a Color Scales option that works like an automatic gradient, blending colors across a range based on each cell’s value. This gives you the gradient look without manually setting stops, and you can later remove the conditional formatting if you no longer need it. Note that color scales fill cells based on values rather than the fixed two-color gradient you set in Fill Effects.
Q: Can I copy and paste gradient fill to other cells or chart elements in Excel?
A: Yes, you can copy and paste gradient fill to other cells or chart elements in Excel by selecting the cells or chart elements that have the gradient fill you want to copy, pressing Ctrl+C to copy them, selecting the destination cells or chart elements, and pressing Ctrl+V to paste the gradient fill. Excel will keep the same gradient type, direction, angle, and stops as the source cells or chart elements.
Frequently Asked Questions
Where is the gradient fill option for a cell in Excel?
For a worksheet cell, the gradient lives in Format Cells (Ctrl+1) > Fill tab > Fill Effects button. The Home tab Fill button only applies a flat color, so use Fill Effects whenever you want two colors blending inside a cell.
How do I apply a gradient to a shape or chart instead of a cell?
Right-click the shape, chart series, or chart area and choose Format Shape (or Format Data Series). In the Format pane, open the Fill section and select Gradient fill, then set your gradient type, direction, angle, and stops.
What is the difference between a gradient fill and a conditional formatting color scale?
A gradient fill is a fixed two-color blend you choose manually and it does not change with the data. A conditional formatting color scale automatically shades each cell based on its value, so the colors update as your numbers change.
How do I change just one color in an existing gradient?
Reopen Fill Effects (for cells) or the Format pane (for shapes and charts), click the gradient stop you want to edit, and pick a new color. The other stops keep their colors and positions, so only the selected point changes.
How do I remove a gradient fill from a cell?
Select the cell, open Fill Effects, and switch the fill back to No Fill or a single solid color, then click OK. To strip every visual setting at once, use clear formats from the Home tab’s Clear menu.
Can I copy a gradient fill to other cells quickly?
Yes. Apply the gradient once, then use the Format Painter to brush the same fill onto other cells, or copy the cell and use Paste Special > Formats to apply only the formatting.